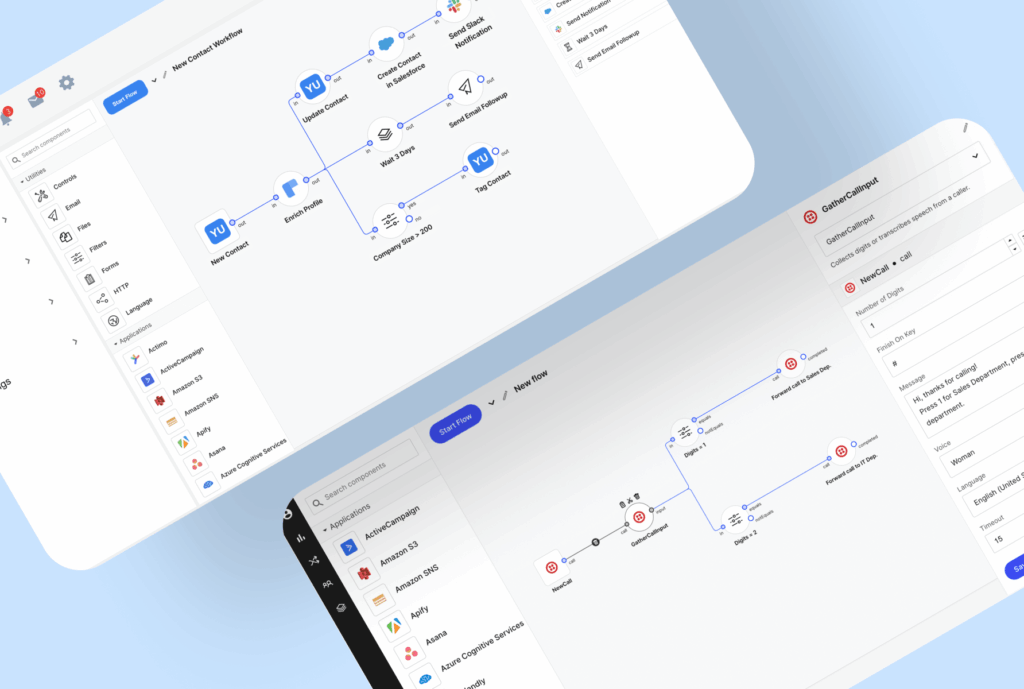


React Flow and JointJS are two of the most popular libraries for building interactive, drag-and-drop diagrams on the web: workflow builders, pipeline editors, org charts, BPMN tools, and other node-based applications. Both give you pre-made components a diagramming app needs, from canvas, draggable elements, connections that follow their endpoints to a data model, along with extensive customization options.
Until recently, a true comparison wasn’t really possible as React Flow was React-native from day one, while JointJS was a framework-agnostic library you had to wire into React yourself, sometimes in a clunky way. That changed when JointJS shipped first-class React integration, JointJS for React. As both libraries now offer an idiomatic React API, we can finally compare them fairly.
Table of Contents
How do JointJS for React and React Flow compare?
At first sight, React Flow and JointJS for React can look interchangeable. Both allow you to create interactive diagrams in React, both are TypeScript-first, both let you draw every node as your own React component, and both pair an open-source core with a commercial offering. For a mid-sized tool with a few dozen nodes and standard interactions, you could ship a finished product successfully with either.
The differences start with one you’ll notice on the two pricing pages, so let’s state it plainly. Both libraries are open-core, they just draw the line in different places and describe it in very different language.
React Flow presents itself as MIT-licensed and free forever, but the paid tier isn’t only support and funding. It’s a body of code examples, and those examples are where a good deal of editor-grade behavior lives: the UI patterns, the layout algorithms, the polish that separates a simple canvas from a product. The core primitives are free, and the implementations are sold. Removing the library’s attribution from your canvas also requires an active subscription.
JointJS for React is more open about the same model. The open-source package is a complete diagramming library, and the commercial tier extends it with a set of production components and plugins, maintained behind a stable API.
Put the two paid tiers side by side, and you’ll notice that the commercial license consists of features that turn a plain canvas into a proper editor. The real difference is that React Flow sells source code you own yourself and then also maintain yourself, while JointJS for React sells components the vendor maintains. That’s the actual trade-off.
The other real difference is which half comes free. React Flow’s free tier is strongest in editor chrome and the interaction primitives beneath it, leaving the deeper diagramming intelligence to implement yourself. The open-source version of JointJS for React is strongest in exactly that intelligence (the model layer, ports, routing, geometry) while leaving the polished UI to you or to its pro tier.
So the real question isn’t “which one is free,” but which half you’d rather get for free, and whether you’d rather build the other half yourself or have someone maintain it for you.
Let’s start with a short introduction to both libraries.
What is React Flow?
React Flow is an MIT-licensed library for building node-based UIs, created by the Berlin studio webkid in 2019 and maintained today by xyflow.
Over time, it became the default diagramming choice in the React ecosystem, with clients like Stripe, Zapier, Retool, and more listed on the project site.
Its funding model is unusual and worth understanding: React Flow Pro is presented as a subscription that funds development and unlocks pro example code and support.
On the surface, it looks as if everything in the library is completely free, but in a practical sense, there are advanced features packaged as code examples in its pro tier.
What is JointJS for React?
JointJS for React is the production-grade option in this comparison, and it earns that label on specifics, not adjectives. The engine was first released as open source in 2010 by the client.IO company and has spent over a decade inside the kind of diagramming applications enterprises actually run: BPMN process modelers, SCADA and HMI dashboards, data-modeling and network tools with customers including Apple, Samsung, Oracle, Intel, Airbnb, Boeing, and many more.
JointJS for React (@joint/react, MPL-2.0) is its new first-class React integration, which includes React components and hooks over the proven engine.
JointJS+, the commercial tier, is shaped like enterprise software. It sells maintained components (@joint/react-plus — zoomable scroller, minimap, stencil, selection, undo/redo) and direct support from the team that builds the library. If your procurement process wants a vendor to call, this is the model that gives you one.
One honest caveat worth noting is that only the React integration itself is new. The engine underneath it and the company behind it are mature, battle-tested in production apps, and more than well-established on the market.
React Flow vs. JointJS — the similarities
Both libraries cover the full range of node-based apps: flowcharts, workflow builders, pipeline makers, AI-agent and automation editors, org charts, ER and network diagrams, decision trees, and more. Both libraries excel at creating diagramming-based applications.
Nodes are React components you write
This is the shared core promise, and both deliver it. No template languages, no class registration; a node is a function that returns JSX, styled with whatever you already use.
TypeScript-first
Both libraries ship complete, modern type definitions. Typed custom nodes in React Flow (Node<Data, ‘type’>), typed cell records in JointJS (CellRecord<Data>). Every sample in this article compiles under strict mode.
Open core with a commercial layer
Both libraries are sustainably funded through a commercial offering, though, as we saw above, the two models gate very different things.
| React Flow | JointJS for React | |
| Package | @xyflow/react | @joint/react |
| Bundle size | ≈62 kB | ≈155 kB |
| Version (August 2026) | 12.11.13 | 4.3.2 |
| License | MIT | MPL-2.0 |
| Commercial tier | React Flow Pro: subscription funding development, advanced examples, and prioritized support | JointJS+: commercial extension adding premium UI components, pre-built applications, and dedicated support |
| Rendering model | HTML nodes in a transformed layer + SVG edge layer | One SVG scene; HTML content via HTMLHost |
| State model | You own the nodes/edges arrays | The graph is the source of truth; controlled mode available |
| Framework | React (Svelte Flow is the sibling) | Thin React layer over a framework-agnostic engine |
| SSR/SSG | Yes, since v12 | No — client-side |
| First public release | 2019 | 2010 |
The difference in license might seem confusing or meaningful, so let’s address it. JointJS license, MPL-2.0, is a file-level copyleft. You can use the library in closed-source commercial products without open-sourcing your application; what you must share are modifications to the library’s own files. React Flow ships under MIT, which is unconditionally permissive.
In a practical sense, there is no difference between those, as it’s very unlikely you’ll dig into any of those libraries’ source code to change it directly.
The differences between React Flow and JointJS
Both libraries solve the same problem, so, as with any good comparison, it’s the differences that should guide your decision. There are five that matter: who owns the state, how far the built-in diagramming behavior goes, what each open-source/commercial library includes, and the depth of their knowledge bases and communities.
Who owns the state: two architectures
The main difference between the two aren’t features, but the architecture.
React Flow is built for React from the ground up, so your diagram state lives in React, and you manage it the way you’d manage any other state. JointJS has its own framework-agnostic core and data model, and the React package is a thin layer on top of that.
React handles the rendering and component composition, while the graph itself, its structure and all the diagram logic stay in a separate model layer you can query, traverse, validate, serialize and manipulate without touching the UI.
That becomes important as soon as your diagrams carry meaning rather than just visuals: hierarchies, constraints, business rules, undo/redo across complex operations, or a domain format you need to read back out.
React Flow architecture
In React Flow, your state is the diagram. Nodes and edges are arrays in your React state, and you wire them up with the shorthand hooks:
const [nodes, setNodes, onNodesChange] = useNodesState(initialNodes);
return <ReactFlow nodes={nodes} onNodesChange={onNodesChange} />;
The architecture hides inside that onNodesChange, so it’s worth seeing what the hook expands to:
const [nodes, setNodes] = useState(initialNodes);
const onNodesChange: OnNodesChange<NodeType> = useCallback(
  (changes) => setNodes((nds) => applyNodeChanges(changes, nds)),
    []
  );
Updating data goes the same direction, through helpers like updateNodeData:
const { updateNodeData } = useReactFlow();
// shallow-merges into the existing data of the node with this id
updateNodeData(nodeId, { label: 'My label' });
This is transparent and deeply React-native: it plugs into Redux, Zustand, or anything else that holds state, and there’s no hidden model to learn.
The cost of this approach shows at scale. If your app has its own domain model, you have to maintain sync between the two, and every drag pushes position updates through your state on the way to the screen.
JointJS for React architecture
In JointJS for React, React handles the rendering and component composition, while the graph itself, its structure, and all the diagram logic stay in a separate model layer you can query, traverse, validate, serialize, and manipulate without touching the UI.
In plain words, the graph is the diagram. GraphProvider holds a real graph object, and your components subscribe to it. Reads are selector-scoped, so a component re-renders only when its slice changes; data writes go through setCellData:
const data = useCell(id, selectElementData<NodeData>);
const { setCellData } = useGraph<ElementRecord<MyData>>();
// updater form = partial update; the plain-object form replaces `data` wholesale
setCellData(id, (prev) => ({ ...prev, label: 'My label' }));
For whole-record changes (position, size, ports) setCell(id, (prev) => next) takes the same updater shape.
Note the inverted default from React Flow: updateNodeData merges unless you opt into replacing; setCellData replaces unless you merge inside the updater. Neither choice is wrong; you just need to be aware of the difference if you’re moving from one library to another.
If you’d rather own the state, similar to React Flow, the controlled mode mirrors every graph change into your own store:
const [cells, setCells] = useState<readonly CellRecord<Data>[]>(initialCells);
const [cells, setCells] = useState<readonly CellRecord[]>([]);
return (
  <GraphProvider cells={cells} onCellsChange={setCells}>
    <Paper />
  </GraphProvider>
);
The onCellsChange event fires with the full, updated cells array. The cells array is compared by reference, and you can update it immutably, exactly as you would React Flow’s arrays.
Additionally, onIncrementalCellsChange event hands you granular added / changed / removed delta after each commit, so you can apply the change to the external store like Redux or Zustand. Note that it works in both controlled and uncontrolled mode.
The difference from React Flow is that you get a genuine model layer that can be exported, diffed, replayed, and that exists independently of React. From a business perspective, this choice predicts integration cost. If the diagram is a view over data that lives elsewhere in your product, React Flow’s plain-state approach keeps things simple. If the diagram is the data (versioned, validated, persisted, audited) the model layer of JointJS is doing work your team would otherwise build themselves.
Hands-on: a pipeline editor in both
To make the comparison concrete, we built the same small app twice: a data-pipeline editor. Three node types (source, transform, output), typed in/out ports, drag-to-connect with validation, labeled edges, with the usual canvas chrome.
Setup and canvas
Both libraries get you to a rendered, draggable diagram in about a dozen lines. Install the library from NPM, import a stylesheet, give the canvas a height, and you’re ready to render some data.
React Flow
import { ReactFlow, Background } from '@xyflow/react';
import '@xyflow/react/dist/style.css';
const nodes = [
  { id: 'orders', position: { x: 40, y: 40 }, data: { label: 'Orders CSV' } },
  { id: 'clean', position: { x: 280, y: 40 }, data: { label: 'Clean rows' } },
];
const edges = [{ id: 'orders-clean', source: 'orders', target: 'clean' }];
export default function Hello() {
  return (
    <div style={{ height: '100vh' }}>
      <ReactFlow defaultNodes={nodes} defaultEdges={edges} fitView>
        <Background />
      </ReactFlow>
    </div>
  );
}
JointJS for React
import { GraphProvider, Paper } from '@joint/react';
import '@joint/react/styles.css';
const initialCells = [
  { id: 'orders', type: 'element' as const, position: { x: 40, y: 40 }, data: { label: 'Orders CSV' } },
  { id: 'clean', type: 'element' as const, position: { x: 280, y: 40 }, data: { label: 'Clean rows' } },
  { id: 'orders-clean', type: 'link' as const, source: { id: 'orders' }, target: { id: 'clean' } },
];
export default function Hello() {
  return (
    <GraphProvider initialCells={initialCells} >
      <Paper style={{ height: '100vh' }} />
    </GraphProvider>
  );
}
Two small structural differences are already visible: React Flow keeps nodes and edges in two arrays, while JointJS keeps one array of cells where a link is just another cell with type: ‘link’. At hello-world scale, though, the two are essentially equivalent
One sizing rule that’s good to know, because it’s the classic first stumble in both libraries: the canvas is only as tall as you make it. A fixed height or 100vh just works; height: ‘100%’ needs the usual html, body { height: 100% } chain. In React Flow, the size goes on the wrapper <div>. In JointJS for React, it goes on <Paper> itself.
Custom nodes as React components
In both libraries, you can wire up completely custom React components using HTML. We’ll build one component (PipelineNode) twice, to see how to set up components in each library. Both versions deliberately render HTML content, the common case for real nodes (labels, badges, inputs).
In React Flow, you register components per node type:
// PipelineNode.tsx
import { type Node, type NodeProps } from '@xyflow/react';
export type PipelineData = { label: string; kind: 'source' | 'transform' | 'output' };
export type PipelineNodeType = Node<PipelineData, 'pipeline'>;
export function PipelineNode({ data }: NodeProps<PipelineNodeType>) {
  return (
    <div className={`node node--${data.kind}`}>
      <span>{data.label}</span>
    </div>
  );
}
You’d wire the PipeLine component in your app like this:
// App.tsx
// Register at module scope, not inline inside the component
const nodeTypes = { pipeline: PipelineNode };
// Each node opts in via `type`, and `data` now carries what the component reads
const nodes: PipelineNodeType[] = [
  { id: 'orders', type: 'pipeline', position: { x: 40, y: 40 }, data: { label: 'Orders CSV', kind: 'source' } },
  // ...
];
<ReactFlow nodes={nodes} edges={edges} nodeTypes={nodeTypes} /* ... */ />
Your component renders as an HTML <div> in a positioned layer above the SVG edge layer. Nodes are ordinary DOM elements, so you can use CSS, Tailwind classes, or any other way you already know to style those.
In JointJS for React, you pass one renderElement function to Paper, and it receives each element’s data as props:
// PipelineNode.tsx
import { HTMLHost } from '@joint/react';
export function PipelineNode({ label, kind }: PipelineData) {
  return (
    <HTMLHost className={`node node--${kind}`}>
      <span>{label}</span>
    </HTMLHost>
  );
}
You’d wire the PipeLine component in your app like this:
// App.tsx
const initialCells: CellRecord<PipelineData>[] = [
  { id: 'orders', type: 'element', position: { x: 40, y: 40 }, size: { width: 160, height: 52 }, data: { label: 'Orders CSV', kind: 'source' } },
  // ...
];
<Paper renderElement={PipelineNode} /* ... */ />
JointJS draws the whole scene, including nodes, inside one SVG tree. HTMLHost is the connection between your HTML content and SVG. You can also skip HTML entirely and return raw SVG, which can make a difference later for export fidelity and print.
As HTMLHost uses <foreignObject>, you don’t really work with SVG elements but instead with standard HTML elements within it (like <div>, <p>, <span>, etc.). As those are standard DOM elements, you can use CSS and Tailwind classes to style those, and it will work precisely as expected.
Essentially, both libraries keep your React components. In React Flow, nodes and edges live in separate render layers, so per-item stacking across them, visuals that span both, and vector output are managed rather than native, also making image export, obstacle avoidance routing, and dynamic node updates entirely up to you. In JointJS, a single SVG scene, through HTMLHost (<foreignObject>), makes dynamic node updates, and image export trivial through the library without third-party tools. To be fair, there are certain drawbacks with this approach when it comes to Safari browser, which might limit your positioning and shadow styling options in that context.
Ports and connection validation
We want a pipeline with specific rules where links can only flow out. You shouldn’t be able to create self-loops or duplicate connections.
React Flow makes connectivity itself opt-in. A custom node has no connection points and can hold no edges at all until you render <Handle> components in its JSX.
// PipelineNode.tsx
<div className={`node node--${data.kind}`}>
  {data.kind !== 'source' && <Handle type="target" position={Position.Left} />}
  <span>{data.label}</span>
  {data.kind !== 'output' && <Handle type="source" position={Position.Right} />}
</div>
You declare direction in JSX with type attribute (target|source). As you’d expect, the target handle can’t start a connection. The rest is yours to write, via isValidConnection:
const isValidConnection: IsValidConnection = useCallback(
  (c) =>
    c.source !== c.target &&
    !edges.some((e) => e.source === c.source && e.target === c.target),
  [edges],
);
JointJS starts from the opposite default where all elements can be linked out of the box, and ports refine where. They’re data on the element record, so a portMap, record of port definitions with passive: true set will make a port target-only:
const inPort: ElementPort = { cx: 0, cy: '50%', width: 10, height: 10, passive: true };
const outPort: ElementPort = { cx: '100%', cy: '50%', width: 10, height: 10 };
const PORTS: Record<PipelineData['kind'], Record<string, ElementPort>> = {
  source: { out: outPort },
  transform: { in: inPort, out: outPort },
  output: { in: inPort },
};
And here’s the main advantage to the React Flow: the validation we hand-wrote above is default behavior in JointJS. Additionally, In JointJS for React, out of the box, Paper rejects self-loops, duplicate same-direction links, link-to-link connections, and drops on the element body when it has ports, which are all configurable. Custom rules stack on top as oneliners:
<Paper validateConnection={({ target }) => target.port === 'in'} />The bottom line is that React Flow bundles ports with your JSX, which is quite readable. JointJS puts ports and rules in the data model, and its validation defaults mean the tedious ground work of basic validation is simply not your job.
The question then becomes: where do ports, link labels, and custom link anchors belong?
JointJS for React and React Flow position ports, link labels, and custom link anchors differently. JointJS puts them in the data. React Flow puts them in the view.
The question really comes down to who authors them. If a user is dragging a link endpoint onto a particular spot on a shape, or typing a label, that’s intent, which means that it has to survive a reload, so it has to be data. JointJS gives you that for free: the properties exist, the bindings exist, and building an editor on top is mostly wiring. React Flow, on the other hand, doesn’t give you that, so you define the model and write the editing code yourself.
The difference is noticeable in the level of diagram details. Anything living in the data can’t be hidden by simply not drawing it; you’d have to mutate the model to make it disappear at low zoom. JointJS has no way to hide ports defined on the model (though there is an experimental renderLink that lets you render links the way you render elements in React with any number of labels). In React Flow, ports are a rendering decision, so rendering fewer of them doesn’t make any real difference.
Essentially, in JointJS, the cost is view logic, while in React Flow, the cost is the model. If you’re building an editor, lean towards JointJS; if you’re building a dense, read-only diagram, lean towards React Flow.
Edges, labels, and routing
This is where the two libraries diverge most.
React Flow ships four edge paths (bezier, straight, step, smoothstep) with labels and arrowheads configured in one place:
<ReactFlow
  defaultEdgeOptions={{
    type: 'smoothstep',
    markerEnd: { type: MarkerType.ArrowClosed },
    label: 'rows',
  }}
/>
Note that none of the built-in edge types actually avoid obstacles. Drag a node between two connected nodes and the smoothstep edge draws straight through it. A custom edge is just a React component, but the routing algorithm inside it is yours to write or adopt from the community (React Flow’s own README points to react-flow-smart-edge for exactly this).
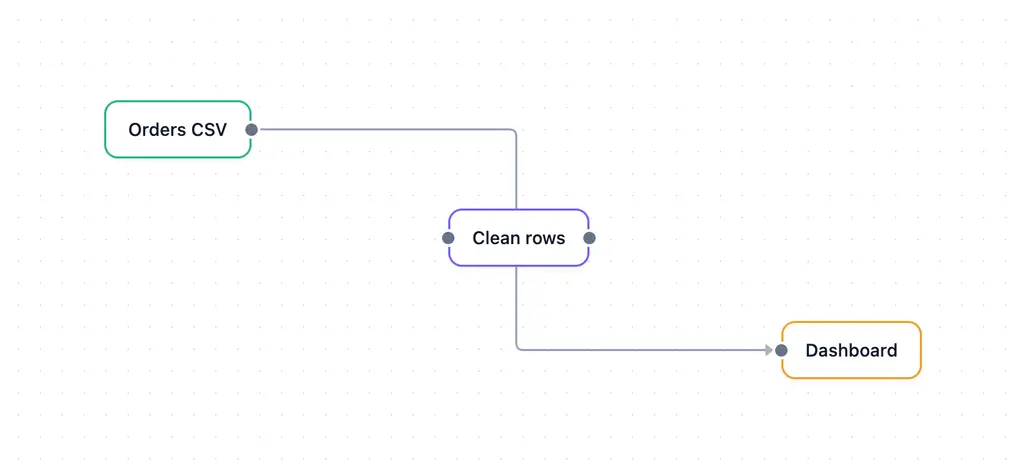
A screenshot of a smoothstep edge in React Flow passing through a node that’s in its path.
In JointJS, routing is one of the core library features. Built-in routers include manhattan, metro, normal, and rightAngle.
You can set up link routing directly on Paper:
<Paper linkRouting={linkRoutingSmooth()} />Or you can even set it up per link. The full JointJS router and connector options can be passed in to the link configuration:
{
  id: 'clean-dash',
  type: 'link',
  source: { id: 'clean', port: 'out' },
  target: { id: 'dash', port: 'in' },
  router: { name: 'manhattan', args: { padding: 10 } },
  connector: { name: 'rounded' },
  labelMap: { kind: { text: 'rows' } },
}
Unlike React Flow, JointJS has obstacle-avoidance built in (manhattan and metro routers), so links will go around the nodes that are in the way. Labels are declarative (labelMap), and the defaultLink option on Paper styles the links — the counterpart of React Flow’s defaultEdgeOptions.
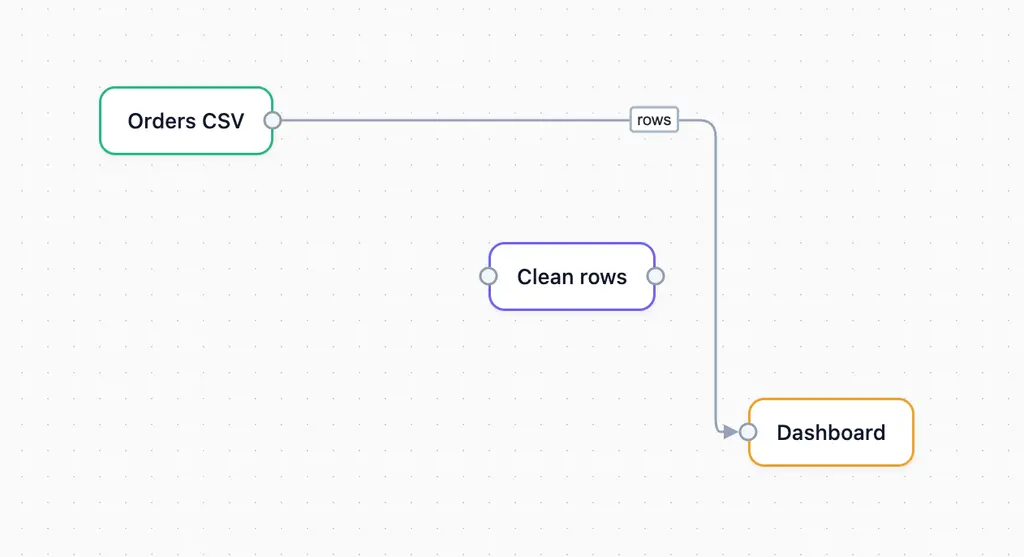
A screenshot of the manhattan router in JointJS for React intelligently avoiding the node that’s in its path.
This is the widest gap so far in JointJS’s favor. Routers, connectors, anchors, and connection points are built into the library and configurable as data; in React Flow, anything beyond the four built-in paths means writing or adopting the algorithm yourself, or using third-party plugins. If your diagrams stay small and tidy, smoothstep is probably fine, but the moment “edges shouldn’t cross nodes” becomes a requirement, you’ll feel this difference.
Canvas chrome (background, controls, minimap)
Pan/zoom controls, a live minimap, and a background grid are capabilities both ecosystems offer — the two put them in different places.
React Flow ships the editor chrome as plug-in components:
<ReactFlow fitView>
  <Background />
  <Controls />
  <MiniMap />
</ReactFlow>
Dotted background, zoom buttons, fit-view, a live minimap, as straight-up components you can include in JSX.
Generally speaking, visual defaults are pre-applied on an untouched React Flow canvas, so it looks designed before you’ve written a line of CSS, while JointJS’s defaults are deliberately neutral. If you want to match the look, all you need are a few Paper props like drawGrid, background, and link styles.
JointJS for React offers the same chrome as packaged components: PaperScroller (infinite zoomable viewport), Navigator (minimap), Stencil (palette), Selection. Just as in React Flow, you included them in JSX as components:
import { Diagram, Paper, PaperScroller, Navigator } from '@joint/react-plus';
function App() {
  return (
    <Diagram initialCells={initialCells}>
      <PaperScroller mode="infinite" style={{ width: '100%', height: '100vh' }}>
        <Paper renderElement={PipelineNode} />
      </PaperScroller>
      <Navigator zoom style={{ width: 200, height: 150 }} />
    </Diagram>
  );
}
Note that we’re using <Diagram> here, which is the equivalent of GraphProvider in JointJS+ for React. It supplies the graph context and lets <Navigator> find its <PaperScroller> sibling automatically. Structurally, this is almost identical to React Flow’s version.
The bottom line is that pan/zoom and the minimap capabilities are available in both libraries, composed the same way (nested JSX). The only difference is that JointJS for React ships this in its Plus package. Two components break that symmetry in the opposite direction. Stencil has no React Flow equivalent: the palette pattern lives only as a free DIY recipe (see the feature matrix ahead).
Performance, layout algorithms, export, undo/redo, and accessibility
Some advanced capabilities you might want to consider when you’re evaluating these libraries (or JavaScript diagramming libraries in general) are performance, auto-layout, export, undo/redo, and accessibility.
Performance
As both libraries are different, creating a reliable, realistic benchmark is difficult; we’ll focus on the underlying architectures and what they mean for performance, along with some observations from real-world apps, or specifically, what happens when a graph gets large or a node gets dragged, and what levers each library actually hands you to improve performance.
Beyond that, we can refer to real tests and reports as evidence that corroborates the architecture. (Not as a neutral or final word, since they’re not all neutral.)
React Flow’s own performance guide is candid about where the risk lives. Node movement triggers frequent state updates, and unmemoized custom node or edge components re-render on every one of them. The documentation prescribes discipline to wrap custom nodes in React.memo, memoize callbacks with useCallback, and avoid subscribing a component directly to the full nodes/edges arrays. This is common in the React ecosystem and can be effective, but it is discipline and something you need to consciously think about. If you skip it, the drag performance degrades in exactly the way their own guide anticipates.
In JointJS, renderElement is scoped differently by design and receives only the element’s data, so it re-runs when data changes, not when position, size, or angle change. (Note that you still have a hook available if you want to know if your element is being dragged.) Those are applied by the view layer directly, bypassing React entirely. Dragging a node doesn’t invoke your component at all. Compared to React Flow, that’s a structural guarantee rather than a development discipline you opt into.
Both libraries ship a free, opt-in mechanism for skipping off-screen work, and both are upfront that it’s a trade-off, not a free win. React Flow’s onlyRenderVisibleElements, off by default, tells the renderer to skip nodes and edges outside the visible area. (The docs note plainly that it “might improve performance when you have a large number of nodes and edges but also adds an overhead.”)
The equivalent in JointJS+ for React is the virtualRendering prop on PaperScroller. When you apply it, only the cells inside the current viewport will be rendered. Just as well, JointJS has implemented a quadtree index on the graph, which helps to locate the nodes and edges currently in the viewport more efficiently.
Both libraries also support LOD (Level of Detail) optimization. In both libraries, you can read the zoom level to conditionally render only what’s actually visible and useful.
An example of LOD optimization in JointJS for React:
import { usePaperScrollerViewport } from '@joint/react-plus';
type DetailLevel = 'high' | 'medium' | 'low';
function selectDetailLevel({ zoom }: { zoom: number }): DetailLevel {
 if (zoom >= 0.75) return 'high';
 if (zoom >= 0.25) return 'medium';
 return 'low';
}
function TaskNode(data: TaskData) {
 const level = usePaperScrollerViewport(selectDetailLevel);
 switch (level) {
   case 'high':
     return <EditableCard {...data} />;
   case 'medium':
     return <StaticCard {...data} />;
   default:
     return <OutlineNode {...data} />;
 }
}
An example of LOD optimization in React Flow:
Published performance tests and real-life reports
JointJS published its own stress test in May 2026: a deliberately unoptimized diagram scaling past 11,000 DOM elements, then the same diagram optimized up to 100,000 nodes using documented techniques, with results being quite impressive. Take it with a grain of salt, as it’s self-published vendor content, even though it uses real numbers and real methodology.
There’s also a comparison of React Flow and JointJS on Synergy Codes blog (before the native JointJS for React integration), which tested both up to 50,000 nodes: React Flow rendered the initial diagram faster, while JointJS held smoother, more stable frame rates during dragging. The conclusion was that React Flow is a bit better at initial render, but performance drops with scale and requires high manual refinement, which is ideal for rapid prototyping. On the other hand, JointJS has a slower initial render, but is more performant and stable with higher node counts (10k+) with no manual adjustment, as the JointJS engine handles it automatically.
Note that you should take this with a grain of salt as well, because, as in the previous example, the results are biased, since Synergy Codes sells React Flow performance consulting. Additionally, the testing was done before JointJS for React was released, which addressed the mentioned negatives.
Another independent report worth mentioning comes from the engineering PR at MongoDB Compass (a serious, widely-used production tool), which added a 250ms throttle specifically to stop its React Flow diagram from re-rendering too often on prop updates, noting a related bug where fast interaction could make a node disappear entirely. Add to that the large number of independent “how to optimize React Flow” write-ups from unrelated authors, several unaffiliated Medium and DEV.to posts, all pointing out the identical things (memoize custom nodes, don’t subscribe components to the full arrays), and the pattern becomes meaningful and worth noting.
Performance takeaway
The bottom line is that both libraries offer ways to improve performance. In React Flow, you need to handle optimization strategies yourself through memoization, while JointJS is built in a way that most of it is handled for you, with defaults prepared for enterprise apps.
It’s worth keeping in mind that React Flow’s re-render risk on interaction is real enough to have reached production apps, and the JointJS, with its React-specific defaults, is built to avoid that exact failure mode entirely.
Whether the gap matters for your use case depends on your diagram size and how disciplined your team already is about memoization. For prototyping, small apps with under a few hundred nodes, the performance shouldn’t be an issue with either of these libraries.
Layout algorithms
React Flow ships no layout algorithms itself; the official guide points you to dagre, d3-hierarchy, or elkjs, and in the PRO examples (Auto Layout, Force Layout, Dynamic Layouting), this is implemented with the mentioned third-party integrations.
In JointJS for React, layout options are built in (force-directed, grid, stack, and tree) and available in JointJS+ for React. Additionally, JointJS ships two more layout options as separate open-source packages: a ranked DAG layout (@joint/layout-directed-graph), and an MSAGL-based layered layout (@joint/layout-msagl).
For example, you can wire up the Directed Graph layout like this:
import { useGraph, useOnElementsMeasured } from '@joint/react';
import { DirectedGraph } from '@joint/layout-directed-graph';
function Layout() {
  useOnElementsMeasured(({ isInitial, graph }) => {
    if (isInitial) {
      DirectedGraph.layout(graph, { rankDir: 'LR', nodeSep: 40, rankSep: 60 });
    }
  });
  return null;
}
To be fair, you have the same hook in React Flow as useNodesInitialized, so you can feed this to an external library. The difference is that in JointJS, this is maintained by their core team and is not a third-party community effort.
Export options
Both libraries provide simple methods to export/import JSON. In React Flow, you can serialize state and use toObject() to save and restore a flow. In JointJS, you can serialize the graph to a plain JSON object using the exportToJSON() method.
Exporting images is a different story. As already mentioned, the two-layer structure of React Flow means that image export is a DIY recipe around a third-party library, html-to-image, and the output is a raster screenshot.
In JointJS for React, the scene is one SVG tree, so vector export is architecturally natural and allows you to export paper as a PNG, JPEG, WebP, or SVG, with optional one-click download through useImageExport() hook. Additionally, you have framework-agnostic functions for BPMN and Visio (toBPMN(paper); a VisioArchive/VisioPage pair with .fromPaper(paper) then .toVSDX()). So if you need export to BPMN or Visio, in JointJS for React that’s a line of code instead of an entire project.
Undo/Redo functionality
You can enable undo/redo in both libraries; they’re just packaged differently. The React Flow gives a Pro example for undo/redo using the useUndoRedo hook, which handles the non-obvious parts like collapsing a drag’s many position changes into a single history step.
JointJS allows you to enable undo/redo with a single prop (history) on <Diagram />, which also automatically enables keyboard shortcuts (Ctrl/Cmd+Z ). For anything that available hooks don’t cover, you can directly use useGraphHistory().commandManager, for example, if you want to group several edits into one command, you can use batches (graph.startBatch() / graph.stopBatch().
Essentially, undo/redo functionality is well covered in both libraries, with the main difference being that in React Flow Pro, you get the recipe of how to implement undo/redo, and in JointJS+ for React you get the component.
Accessibility
React Flow provides keyboard and screen-reader support to help meet accessibility standards. By default, all nodes and edges are keyboard-focusable and operable, along with some props that allow you to customize those (nodesFocusable, edgesFocusable, and disableKeyboardA11y). Additionally, React Flow uses semantic ARIA roles for interactive controls, and you can override those using the ariaRole prop. The live announcements stay generic by design (the default live-region text says literally “Moved selected node,” not “Moved the S3 bucket node) — a meaningful per-node accessible name is still something you need to write yourself. The framework makes the node container focusable, but whatever you render inside it (buttons, inputs, labels) still needs to be accessible on its own terms, the same as any custom React component anywhere else.
JointJS, on the other hand, mainly sets up the accessibility basics and gives you tools to handle it properly, along with precise examples of how you can implement it through their demo apps. JointJS for React sets up the canvas and interactive controls with tabindex, but leaves it to you to handle keyboard navigation. Still, note that through HTMLHost, whatever real HTML you put inside a node keeps its own native semantics, so if you’re using accessible HTML elements (like <button>, for example), they will be accessible and keyboard-operable by default.
The gap compared to React Flow, which gives you basic interactions, might be in the variety of applications and use cases, as assuming anything at the library level might be inefficient or possibly misleading. (For example, not all diagram layouts have movable nodes.)
The bottom line is that React Flow sets up the basics of accessibility a bit better, which might help you get started, but the full accessibility in both libraries is still your responsibility and, in either case, requires manual effort and testing, which largely depends on how the app itself is built.
Difference between React Flow Pro and JointJS+ for React
Before going further, it’s worth answering how different React Flow Pro and JointJS+ for React actually are. Turns out, much less than the marketing implies. Both libraries sell the same underlying capabilities; only the packaging is actually different.
On a specific example of undo/redo, in React Flow that’s a Pro example (history logic you download and own), and in JointJS+ for React, you get a maintained component (history prop for <Diagram>). Other features follow the identical pattern, where with React Flow Pro you get a code example, while in JointJS+ for React, you get a component.
The React Flow Pro examples are maintained, downloadable proper implementations that a competent team could otherwise build from React Flow primitives. JointJS+ for React’s equivalents are maintained components you license instead of build.
In terms of feature richness, especially in an enterprise context, the exceptions are worth naming. Stencil (a drag-from-palette components) exists only in JointJS+ for React; React Flow has no packaged version, only a free DIY recipe. BPMN, Visio, GEXF, and the ability to prepare the canvas for printing are real JointJS+ for React modules with no React Flow Pro counterpart at all. On the opposite end. live collaboration (built on yjs) is a React Flow Pro example with nothing comparable found in JointJS.
Past these few notable exceptions, each tier’s full component list contains several more specific items that might be different, but in practical terms, both libraries offer mostly the same features.
The difference in subscription models is worth noting as well. With React Flow, once you subscribe to the Pro tier, you can download and use the downloaded Pro code forever. What’s actually different from JointJS+ is who’s responsible for maintaining code afterward. Specifically, the Pro example from React Flow transfers the responsibility to you. Once you download the Pro example, your team owns and maintains it. A JointJS+ for React component, on the other hand, is maintained by the vendor for as long as you have a valid license.
For enterprise teams, that distinction matters more than the price tags. Owning React Flow Pro code means vetting it yourself and updating it across library versions; leaning on JointJS+ means the vendor stays on the hook for as long as the license runs.
In practical terms, you shouldn’t evaluate the price differences or features in the pro tiers but rather whether your team would rather own the maintenance burden or hand it to someone else.
Knowledge base
Whether you build in-house or with a software agency, the strength of a library’s documentation and examples directly affects development speed. Developers who can find high-quality example code for their problem ship better products faster.
React Flow’s knowledge base consists of a large example library, shadcn-based React Flow Components, and full app templates. If you hit a problem, someone has almost certainly hit it before you and written about it.
Just as well, JointJS has extensive docs, and the new React documentation is fresh and example-dense, while the core library project ships 180+ pre-built apps with source code you can reference yourself. (Note that not all pre-built apps have React versions currently, which is expected due to its recent release.)
Working with AI coding agents
It’s also worth knowing how each library treats AI coding agents differently.
JointJS ships an official, hosted MCP server at https://mcp.jointjs.com/mcp, so there’s to install or run locally. You point your AI Coding agent (Claude Code, Cursor, VS Code Copilot, or Claude Desktop) at the URL (claude mcp add jointjs –transport http https://mcp.jointjs.com/mcp) and the agent gets direct access to up-to-date docs and example apps: live lookups against the real, current API rather than whatever a model happened to see during training.
That matters even more for projects in active development, where it can take some time for models to update their training sets.
React Flow’s investment runs the other way, and its own team has been refreshingly candid about why. Their engineering blog explains that they only shipped /llms.txt so agents can parse the docs without crawling the whole site. Separately, they tried turning their Pro examples into agent skills, but found they “don’t help much,” and paused further agent-specific tooling for now.
The bottom line is that these different approaches aren’t wrong, but rather practical. A newer JointJS for React API benefits disproportionately from a live lookup tool (MCP Server), while React Flow, which has been publicly available longer, has more training-data exposure, so AI coding agents have a better grasp on it. If you build with AI agents daily, the practical difference is that JointJS MCP Server is official, with essentially zero setup, while React Flow relies on training sets without official tools to help you with AI-assisted development.
Community
When it comes to community, the sheer size is not what really matters, but actual activity. By that measure, both libraries are genuinely lively.
React Flow ships continuously and runs at real volume: @xyflow/react, current version 12.11.2, is pulling roughly 9,8 million downloads a week as of this writing. The xyflow/xyflow repo backs that up with a continuously-running CI pipeline (dependabot updates, CodeQL scans, a Playwright test suite, all firing on recent commits) and dated releases, shipped by named maintainers fixing specific, unglamorous things. That’s what an “actively maintained” library looks like in practice. Discord is where the community is active in discussions with 6,9k members.
The activity of JointJS lives mostly at the core library layer where @joint/core pulls roughly 50,000 downloads a week. The GitHub repo shows a small, actively tended issue queue rather than a neglected or overwhelmed one, and recent releases from named engineers, the same people publishing @joint/react itself, so the React layer isn’t a side project bolted on by a different team, but shipped by the people who build the engine. GitHub Discussions is where the library’s own engineers answer directly, and the org has brand-new 2026 repos investing specifically in AI-agent tooling beyond the MCP Server covered earlier, including a dedicated Claude Plugin Marketplace, which says that the team actively keeps up with development trends.
As JointJS for React is weeks old, the number of downloads on @joint/react itself (roughly 500 downloads a week) is expectedly smaller, and should be viewed in the context of the core, established library that powers JointJS for React.
While the community size leans heavily towards React Flow, both teams seem to be in active development and in constant communication with the community.
Which library should I choose, React Flow or JointJS for React?
Both libraries have their own set of strengths, but there are several important factors you should consider when choosing, and we’ll outline them here as clearly as possible.
Use case and scale
If you need to ship a polished, interactive HTML diagram really quickly, if you need to build an interactive prototype as a proof of concept, React Flow is an excellent choice.
If the diagram is the product, along with validated connections, links that route around obstacles, real vector export, formats like BPMN or Visio, reliable performance at scale, JointJS for React will solve all challenges you’d otherwise need to build by hand.
Enterprise support and product lifetime
If you’ll be developing and maintaining the application over a long period, you should consider JointJS+ for React. It comes with vendor-maintained components and direct support, as opposed to community packages that your security review must vet and your team potentially adopt if abandoned.
The core engine of JointJS for React is framework-agnostic, so your graph model and diagramming logic can stay solid if you need to change the frontend framework under them.
Licensing and pro tiers
React Flow license is MIT, while JointJS open-source packages are MPL-2.0; the practical difference, as already stated, is pretty much non-existent unless your organization straight-up bans copyleft or mandates MIT.
The bigger difference is the shape of features you pay for in their Pro tiers. React Flow Pro sells examples, support, and a subscription that keeps the project going. In JointJS+ for React, you get maintained advanced components , with per-seat access through the my.jointjs.com portal, a private registry, and a 30-day trial to test everything properly before you commit.
AI-assisted development
This is a newer factor worth considering, as most development teams lean heavily on AI Coding Agents these days.
React Flow’s AI-friendliness is passive. The library is old and popular enough, so most coding models already know it well from their training sets, so any AI coding agent, whatever your team already uses, can write reasonably good React Flow code.
JointJS for React has just recently been released, so it might take some time for AI training sets to get up to speed. This is offset by their MCP server, which has direct access to official, up-to-date docs and demo apps, giving you high-quality code without relying on training sets.
With React Flow, there are no official tools and no setup, but you rely on the model’s frozen memory of the library. JointJS for React is fairly new, so you rely on their MCP server to always get up-to-date docs and API that can’t go stale.
Conclusion
Both React Flow and JointJS for React are great libraries, but React Flow seems to be more in tune with small applications and prototypes, while JointJS for React is better suited for large diagramming applications, particularly in an enterprise context.
Before committing to either of these libraries, consider what your product might look like in the future and how the requirements might grow. If your use case is simple and small-scale, React Flow will do great, but once you cross from “node-based UI” into “diagramming application,” you’ll likely feel the difference. That’s essentially the boundary between these two libraries in one sentence.
Resources
- Homepages: React Flow · JointJS
- Docs: React Flow · JointJS for React
- Repos: xyflow/xyflow · clientIO/joint