
When creating applications that are becoming ever larger and which more people are working in, we are exposed to making more and more mistakes by manually executing some stages. To speed up the work and to avoid unexpected errors in the application, you can automate some things. That’s why a few days ago I decided to work with Gitlab CI and automated the development process from a commit to check the quality of my code with lint, make unit tests, build, and deploy my application.
In today’s entry, I would like to provide you with a description of what continuous integration is, using the Gitlab CI/CD tool. As an example, I will use the angular project. We will go through the implementation of CI for angular applications, defining a pipeline in gitlab-ci.yml files to build, deploy and test your applications, and assigning jobs to stages. The next step will be to create and register a runner, which will run and execute our stages.
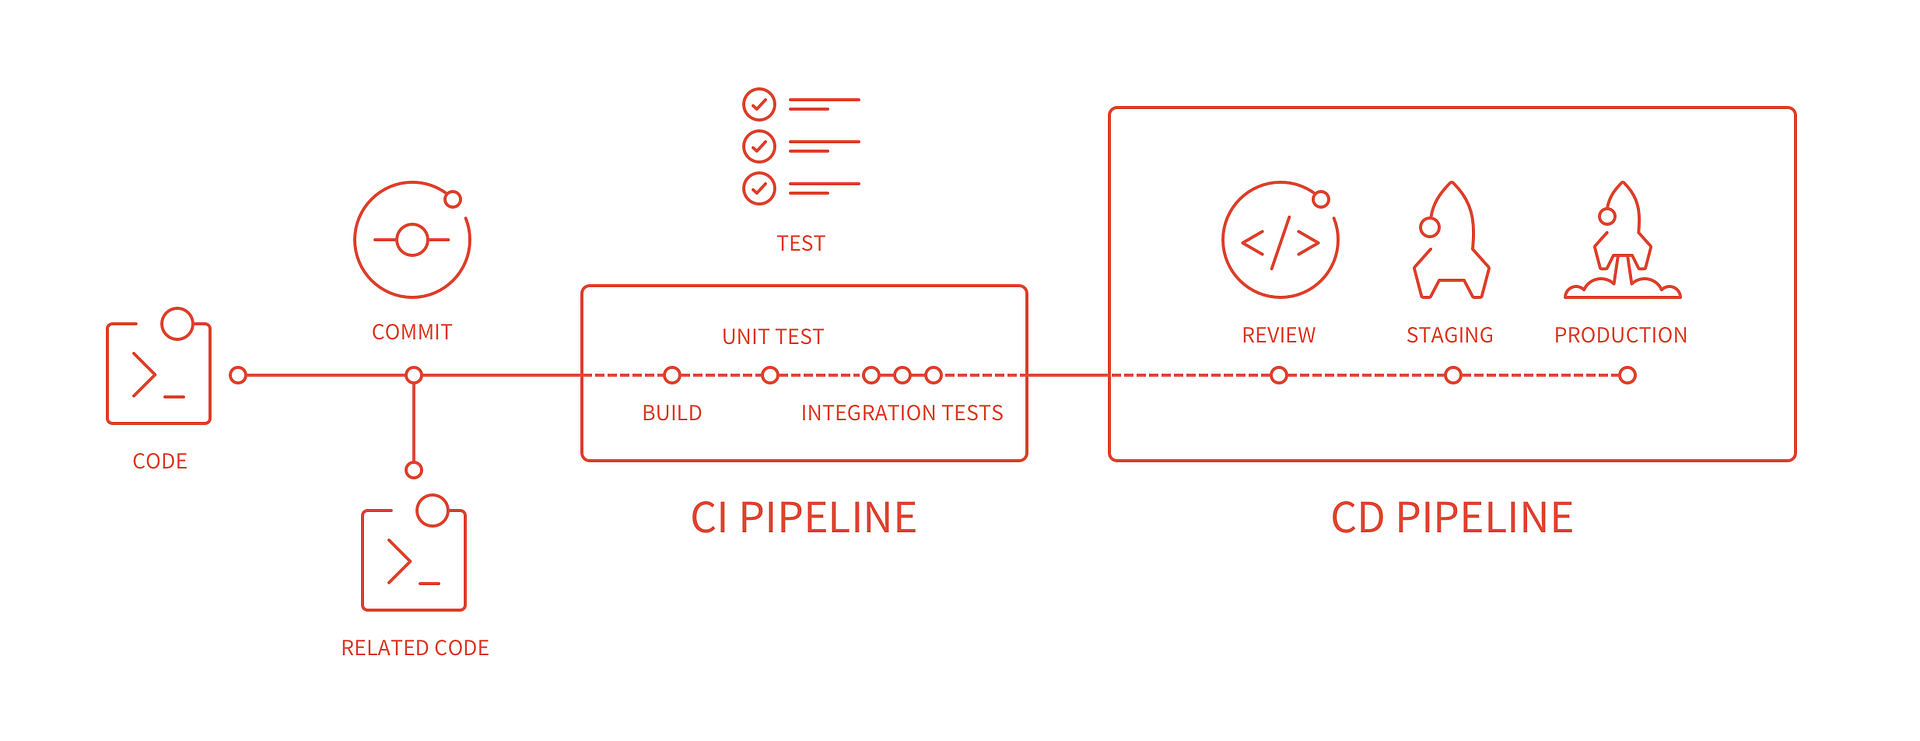
What is CI/CD?
Continuous integration (CI) is a development practice where developers merge their own code with a shared repository several times a day.
Continuous delivery (CD) is a software development practice where code changes are automatically built, tested, and prepared for a release to production.
What is Gitlab CI/CD?
GitLab is a platform for storing and sharing public and private code repositories, but also a platform that provides tools for task management, software versioning, continuous integration and continuous delivery. Since version 8, Gitlab has been enriched and integrated with the possibility of CI/CD.
GitLab CI/CD is a tool for building, testing, implementing and monitoring applications and is integrated with the GitLab code repository.
The advantage of continuous integration is the automation of the integral part of the workflow.
Read also: How to Make Your Web App Mobile with Cordova
Let’s start
In order to use the tool, we first need to create a new project in Gitlab containing an example application. We can also import our repository from Github.
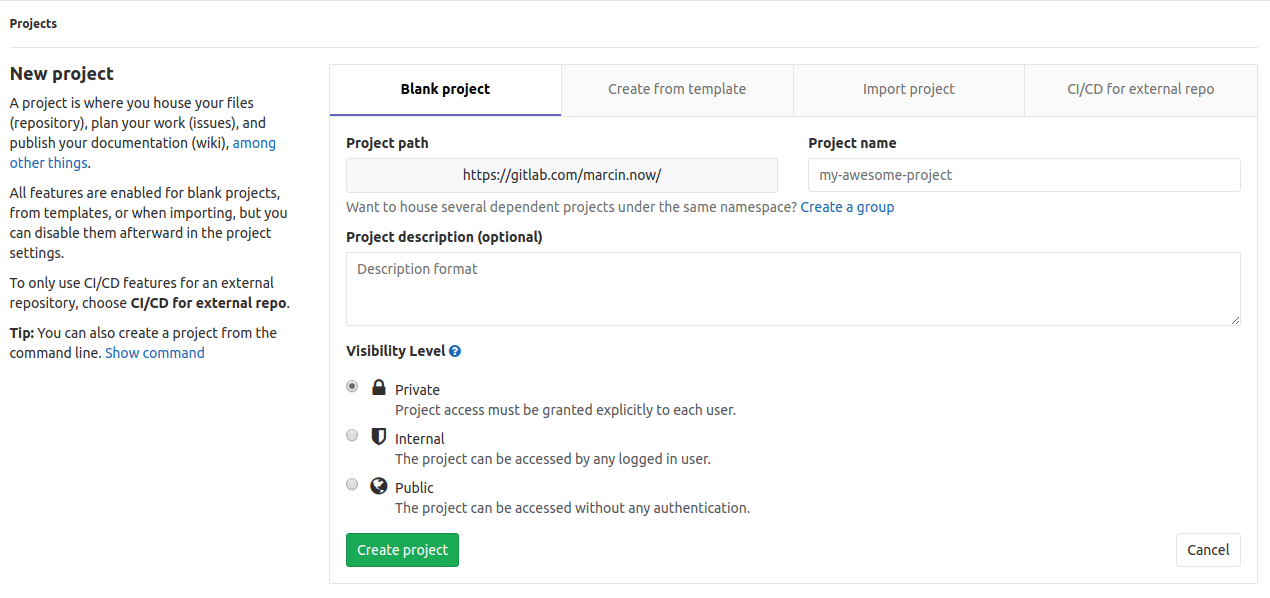
Then, we need to create a file .gitlab-ci.yml and add it to the root directory of your repository. In our case, it can be a project created with the use of the ng new your-project command.
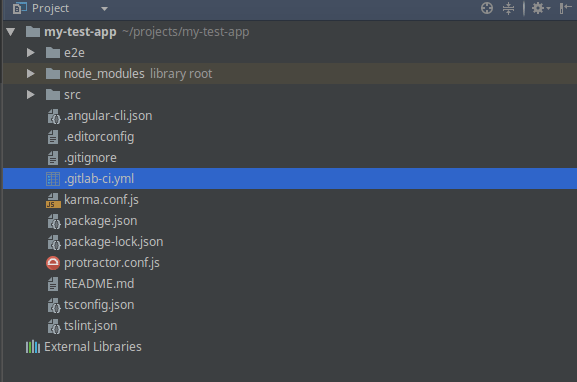
Gitlab uses the above file to define the project configuration.
Configure Gitlab CI file
In order to present the process of continuous integration, I will use a simple example of an Angular project.
Now, let me explain what is going on here:
First, we can define variables to store project configuration. Variables can be defined at a global level (access to all stages), but also at a job level (access to a defined stage).
Next, we have to specify a definition of all the stages that need to be run after a CI/CD pipeline is triggering in response to a git push/merge. The stages property allows you to define the order in which tasks should be performed and is defined globally.
Stages consist of the stages that will be defined below the list.
We define image which is the name of the Docker image that the Docker executor will run to perform the CI task.
In every step, we have to use a keyword script which is executed by the Runner.
We can use also Tags, used to select specific Runners from the list of all Runners that are allowed to run this project.
We defined cache files – these are used between runs or stages (instead of downloading them again).
It can help decrease the time that it takes to run jobs. In our case, we are caching the node_modules directory, where npm will install the dependencies it downloaded.
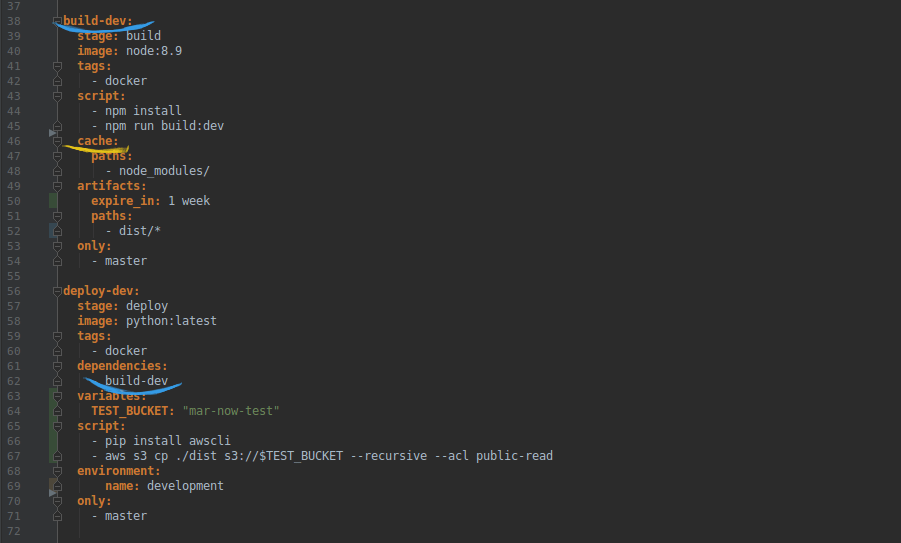
Artifacts is a list of files and directories which is attached to the job after success.
We define them by referring to the paths, in our case to dist/*.
By default, these files will be stored in Gitlab all the time, but we can use the command expire_in and store our files for 1 week.
We can also define, which branch we can use to execute a job, for example only: master.
In deploy-dev stage, we define dependencies, necessary in connection with artifacts from the previous stage „build-dev” and environment keyword, used as a hint for Gitlab that this job actually deploys to this environment’s name.
As we can see, there are many ways to configure stages. Using Gitlab Continuous Integration (CI), we can automate the entire deployment process using destination platform, such as Amazon S3 google clouds, and many more. You can read about deployment with S3 in this tutorial.
Push .gitlab-ci.yml to GitLab
After creating the .gitlab-ci.yml file, it should be added to the Git repository and sent to GitLab.
git remote add origin  git@gitlab.com:XXyour_userXX/XXyour_projectXX.git
git add .
git commit -m 'initial commit with gitlab-ci file'
git push origin master
In our repository, which contains the .gitlab-ci.yml file, the new commit will start a new CI run. The status will change to “pending”. The next step will be to configure the “runner”.

Gitlab Runner
Runner is a process that runs tasks. It can be a virtual machine or docker container. GitLab allows us to create our own Runner (Specific Runners) or use a Runner provided by GitLab (Shared Runners).
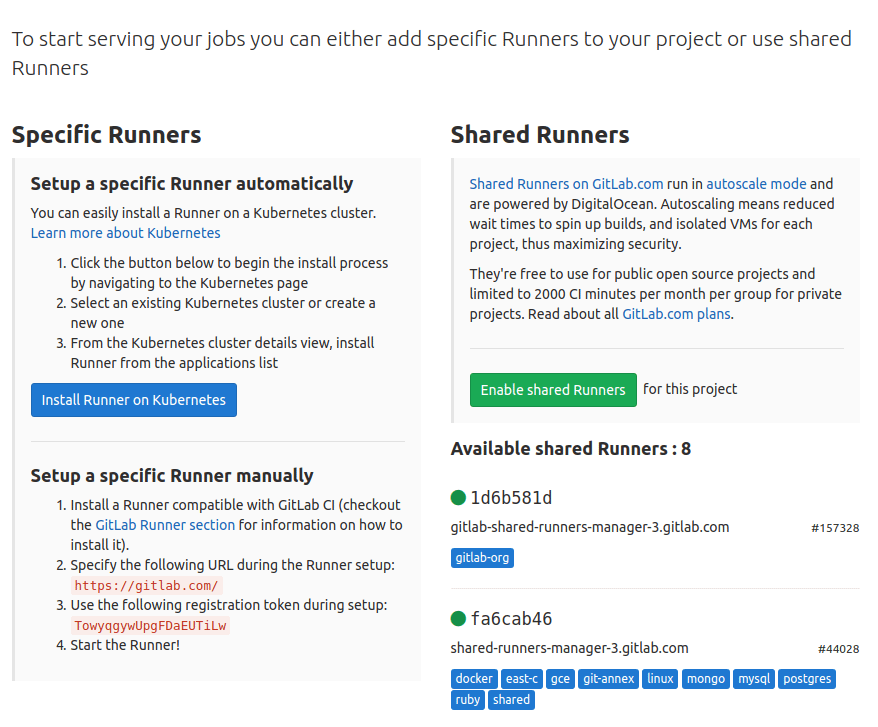
We can note that Shared runners are already available to us and we can easily launch them by clicking “Enable shared runner”.
To operate only for our project, we can configure a Specific runner. In this case, Gitlab Runner on the local station for compiling the project will require the installed Docker (Install docker). In order to install your own Runner on the local station, we add the official Gitlab repository.
curl -L https://packages.gitlab.com/install/repositories/runner/gitlab-runner/script.deb.sh | sudo bash
and we install the latest version of GitLab Runner:
sudo apt-get install gitlab-runner
We can find the details of the installation in the official documentation.
Register runner
The registration process is used to connect the runner to a specific project. To do this we must use a unique token available for each project. We find a token in Gitlab tab Settings -> CI / CD -> Runners settings -> Specific Runners.
To run the Runner registration, execute the following command:
sudo gitlab-runner register
The command should include the following information:
- url gitlab- token for repository
- description for runner
- Tags specifying for which task types the Runner is
- executor
- docker image.
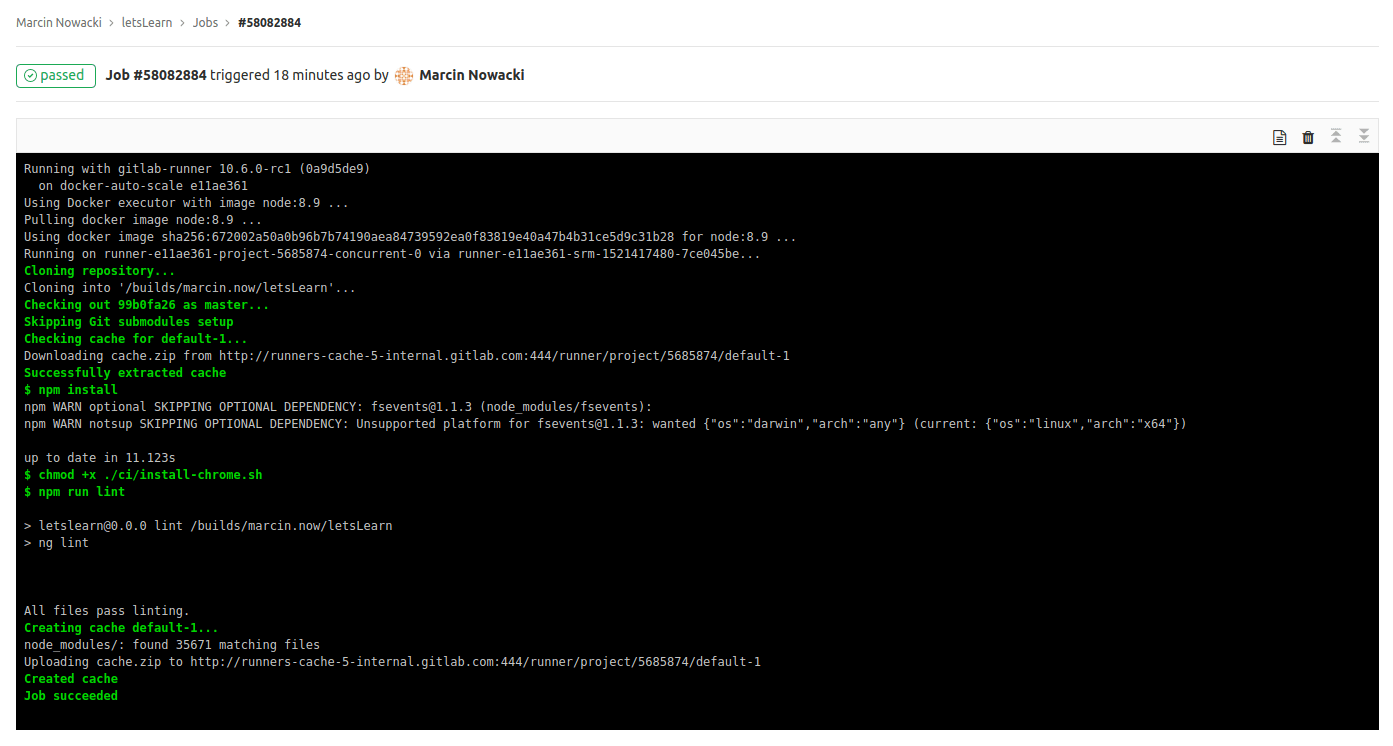
Status of your pipeline
If you have successfully set up the Runner, you should see the status of the last commit change from pending to running, passed or failed.


If you click on the status of the job, you will be able to see its log. This is very important, because this way you check what went wrong when your task is failed.
Gitlab CI/CD can be an interesting tool for integration and implementation. All of us should depend on a quick and correct delivery of the code and that’s why this tool was created. The configuration of each application may take you a while, but once you do, you truly appreciate it for its convenience and accelerated time to work on implementation.